Storytelling Part 3: Teaching Kids How to Understand Their Stories
There are so many different ways to tell stories. Some stories and storytellers are quiet. They sit or stand and draw the audience in. Some stories are lessons or history, while others are more for fun. Storytelling is an old and powerful art form and teaching kids how to capture an audience through storytelling is an important skill.
The format I chose to teach the kids was more light-hearted and performative. The basics are still the same, but the delivery involves standing and a bit more movement.
Lesson 1: Learn about story types
When you are teaching a unit about storytelling, you have to decide what types of stories the kids will tell. Will they write their own? Are you tying it into other curriculum? In BC, ancient civilizations falls under grade seven, so when I taught grade seven, my students told Greek Myths. This year, my librarian and I chose fables and folktales. This allowed the kids to learn some new stories that all had a very linear plot easy to build on. The reason I like to choose one story type is that kids can learn the hallmarks of that story and begin to recognize the structure of other types of stories as well.
This lesson was an accident…you see it was supposed to be a 10 minute intro into what the kids did in lesson two, but kids are kids and school is school. Sometimes, things take longer and become something powerful. I am grateful that I had the luxury of flexibility and let the kids run with this deceptively simple lesson.
Materials/Prep
Sticky notes
T-chart with titles Fairy tales and Folktales/Fables on the board and at each table (I have erasable whiteboards)

Lesson
We asked the students ‘What are fairy tales and stories you know?’
As the students gave ideas, Chantal (my librarian) and I wrote the story beside the T-chart on the board on whichever side the story fell on. (e.g. Cinderella = fairy tale, The Tortoise and the Hare = fable)
When we had about 15 on each side, we asked the kids to fill in the T-charts with their groups about what they noticed each type of story had in common. For example, the kids noticed that Fairy tales always had magic, but this wasn’t true for folktales or fables. They also noticed that fables and folktales were much more likely to have talking animals.
As the kids worked on their T-charts, Chantal and I circulated. We picked up ideas from the group T-charts and filled the one on the board. If I am trying to do a group brainstorm, this is something I often do. I get kids talking in small groups/brainstorming and I circulate to pick up ideas or ask the kids themselves to write on the board. This gets the kids thinking, contributing, and talking more of the time than a traditional brainstorm.
When the kids seemed done and the board was populated, we went through each side as a group and asked the kids to write on a sticky note, which characteristic of each story type they thought was the most important and why. The kids then had to RUN up to the board and put their note on each side of the T-chart. A little bit of chaos and a whole bunch of joy.
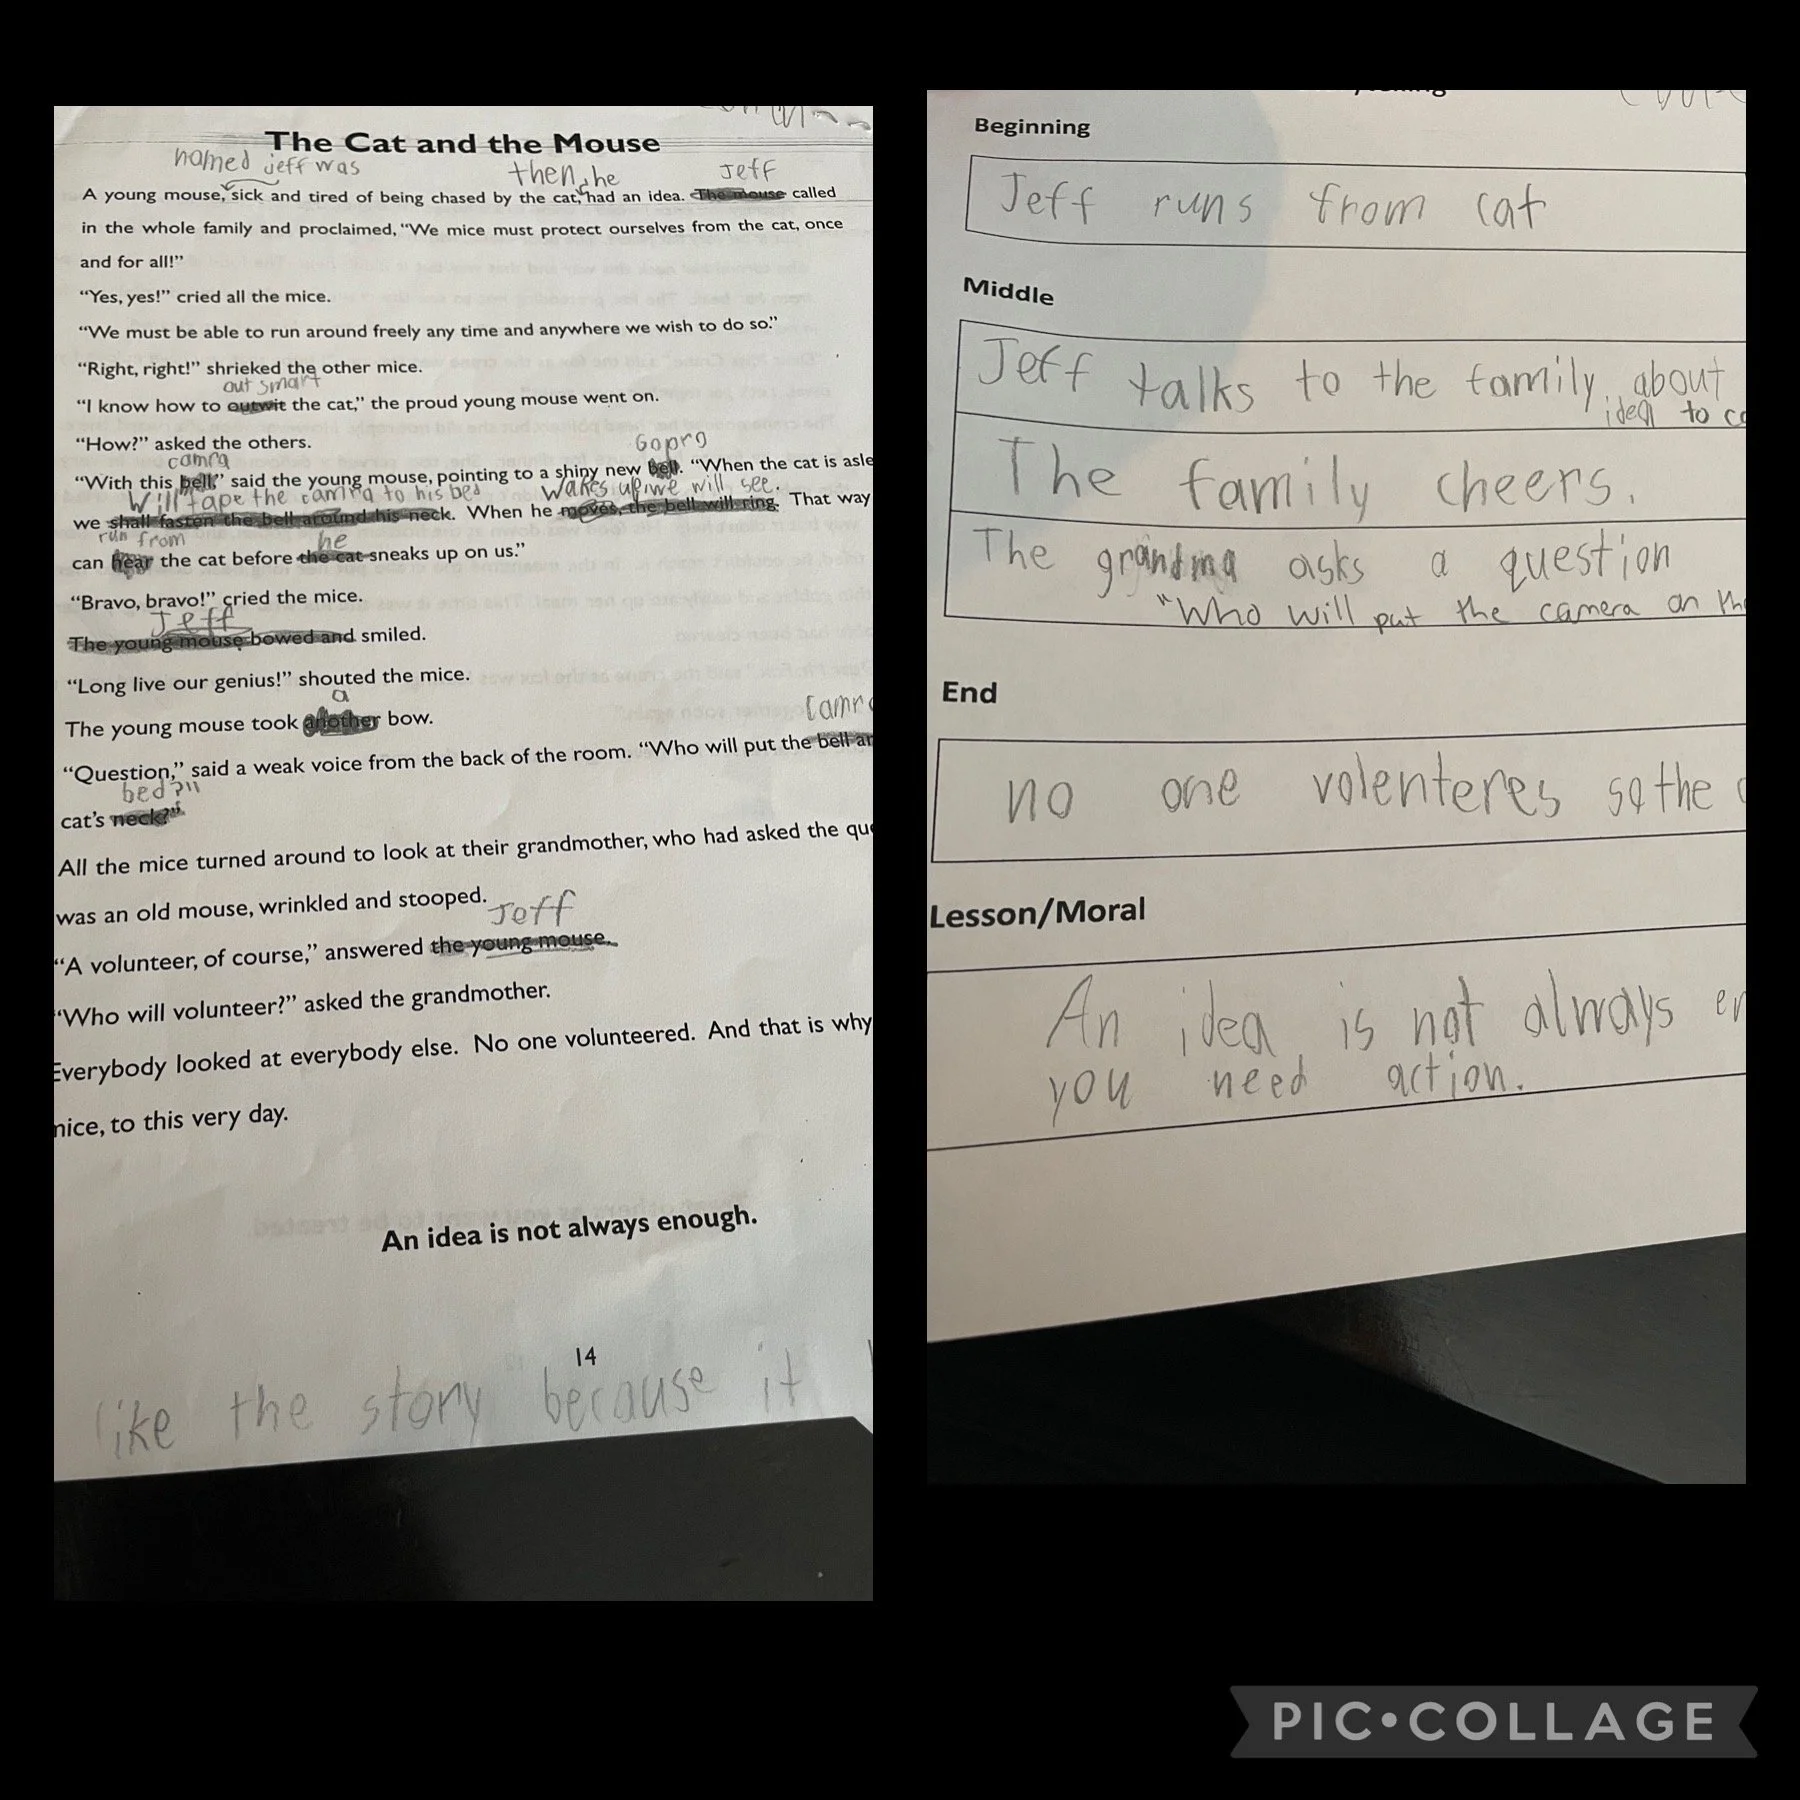
We told the kids they would be telling folktales/fables and we wanted to model how to do it. I chose a story from the list the kids had created: The Three Little Pigs, and asked them to tell me the main points. This was the first time I had modelled the 5 anchor point method for remembering your story.
What happens at the beginning?
What are three things that happen in the middle?
What happens at the end?
Are their important lines I should be repeating?
What is the lesson/moral I should emphasize?
Once the anchor points were on the board, as well as the repeated lines and the lesson, I modelled telling the story. Was it perfect? Nope! Did the kids love it? Yup.
The point of this lesson is for kids to start to see the differences in all story types. We chose the comparison to fairy tales, because it is easier to see the more subtle differences when you are comparing two different things. My favourite thing a few groups came up with for folktales was that they have lots of food…so random and adorable….and true! This lesson for me was a reminder that learning takes patience and time…so we must be flexible!
Lessons 2/3: Learn how to analyze your story
Lesson 2 was modelling the process with two fables and Lesson 3 was the kids using their own stories, but the same graphic organizers and the same process was used. The process of gradual release so kids can be more confident that we all learned about way back in teacher education still works. If you choose a different story type, you will need to make a different analysis sheet.
Materials
One between two for lesson 2
One per group for lesson 3
Stories to analyze
1-2 fables per table group for lesson 2
pack of 2-3 fable/folktales per storytelling group (the packages should have some overlap, but mostly be different)
Lesson 2
We gave each table the graphic organizer & we took a moment to go over it/connect it to the previous discussion
Chantal read a fable out loud and ask groups to just listen until the end and then discuss what criteria it met.
We then handed out the SAME fable and read it out loud again (fables are usually about 200 words) so groups had a chance to find the criteria again.
We wanted to get kids thinking about changing stories and modernizing them, so we asked the groups to add to the fable sheet, ideas to modernize both the story and the moral to make it more relevant and accessible to all listeners.
We repeated steps 1-4 with a second fable
At first the kids did not understand the short story, but the second they started to see the criteria and unpack the important points, they started to understand structure. The groups LOVED diving in to think of ways to modernize the story and we shared ideas as a group. By the end of this day, the kids had to let us know if they were telling their story in pairs of by themselves.
Lesson 3

Each storytelling group was given a package of THREE folktales/fables to choose from. Many groups had overlaps but we had selected about 25 stories for 18 groups. The students were given time to look at the stories and pick their top three for telling. We SHOULD have pulled random numbers and just written down top choices from groups to make sure everyone had a different story. We did something convoluted that took forever.
Once each group had their story, they were given THE SAME ANALYSIS sheet from the previous lesson and asked to fill it out/ start to think about modernization.
We stapled the fable to the analysis sheet and handed it in (We didn’t want this to get lost).
Lesson 4: Designing Anchor Points (Stone Soup Lesson)
Materials
Stapled packages of stories
Anchor Point Graphic Organizer
one per table group (group of 3) for modelling story
one per storytelling group for actual story
Picture book of a fable/folktale that is easy to follow
Lesson
We gave each table group one anchor point sheet to use during reading
We reviewed how you can pull a story into five big points and that these become what the storyteller memorizes. These points NEVER change and are like benchmarks for getting the next part of the story.
Beginning
Middle
Middle
Middle
End
3. My amazing librarian read Stone Soup

4. The kids analyzed the anchor points and the moral/lesson as a group
5. The class helped me write a class set of anchor points on the board
6. I then picked up a different colour of whiteboard marker and asked the class to help me modernize it. Some of the details they created were:
The three people who came were community gardeners who work in Surrey
The ‘town’ became a complex where the people didn’t get along very well
We added an environmental theme that making the garden would allow for more local access to food an less waste
The kids listed off vegetables they love
7. I then took a deep breath and modelled telling their story. I made sure I hit every anchor point and added more details in. My librarian filmed me and it was 10 minutes….so much energy to do this, but worth it. The kids saw again how you can move from written text to modernizing to storytelling. Was the story perfect? Nope! Normally a storyteller has time to practice and think more on details and nonverbal communication. I had to trust the path that words led me down. Did it have the desired effect? Absolutely.
8. When all of the storytelling was done, groups were given their story and a new anchor point sheet. They finished analyzing their stories very quickly and stapled the new sheet…and…handed it back in.
Next Steps
By the end of these lessons, the kids really understood their stories. The next blog post talks about how the kids developed as storytellers and dramatic performers.